INLAND NW ROUTES |
|
|
As summer is in our rear view mirror, fall is all around us.
And so are the cool temps, and most sunny days. When we want to hike, we must plan our outing with care, to make sure we carry the appropriate clothing and safety supplies. CLOTHING. What we wear in the fall is very important. The most valuable advice I can give you, is do not wear ANY COTTON CLOTHING, PERIOD. When cotton gets wet from the environment, rain or snow, or from the dew off the brush, and sweat, our body core temperatures can drop to dangerous levels. If this happens to you, you must have the correct clothing for the circumstances. BASE LAYERS The layer next to your skin, should be polypropylene. Polypro is a high tech material that wicks moisture and sweat away from the body, hence you are warmer. When you sweat, your body is cooled via evaporation. But if that sweat stays on your skin, it allows your bodies core temperatures to drop. When that happens, your life could be in danger. Hypothermia is a cold temperature condition that can affect you even when the temperatures are in the 60’s. A light wind can exponentially drop your core temperatures. It’s called windchill. WARM LAYER The next layer or two, will keep your body warm. But be aware, if you are scrambling a steep slope, the fleece you are wearing could cause more sweat, which can drop your core temps. Fleece is a material made out of our discarded plastic bottles. Its most important properties, is that it causes loft. Loft is the space between your base layer and your outer waterproof jacket. The more loft, the warmer you will be. OUTER JACKET Don’t scrimp on the outer layer. It’s design is to keep you dry, and warm. It also keeps the wind off your body. A slight wind can drop the ambient temperatures to drop to dangerous levels. This is called WINDCHILL. As the winds pick up, it cools our bodies. Now that you know about proper clothing, it is important to understand that when you go out into Nature, what you wear is critical to your survival. If it rained the day before, there’s going to be rain drops and/or dew on all the plants you rub against while walking. When you get wet your bodies temperature drop. But don’t just think of yourself. While out on cool fall days, monitor your hiking friends. If you see a person unzipping their jacket, taking their gloves or hats off on a cold day, that’s a big clue. Also watch your hiking buddies for slurred speech, erratic behavior, or a noticeable change in their normal behavior. If you or anyone around you displayed any of the above behaviors, take action immediately. Get their hats, gloves, jacket back on them or you, and start moving. If there’s an up hill trail, walk up the hill. It will warm you. To tell if your buddy is too cold, ask them questions that require a thoughtful answers. If they fail, act immediately to get them warm and down to safety. The reason I want you to know about hypothermia, is because even on a sunny day in the fall, up at your favorite backcountry lake, you could become too cold to help yourself or your buddies. Hypothermia is a condition that can kill you. Take with you what you need to be safe, comfortable and warm. If you don’t take the proper clothing, you will suffer. One thing about hypothermia is when you get colder, your mind plays tricks on you. You may start discarding clothing, and not realize you are in danger. Last week I went on a hike with a friend and took all I may need, just in case. I dressed properly for the hiking conditions, but when we stopped for lunch, I became cold. In my pack was down pants and a down jacket. They stuff into very small bags, and don’t take up much space. I pulled out my jacket and fluffed it, and put it on. Immediately I felt warmer, and during lunch I was comfortable. When we started walking again, I simply stowed it in my pack. By carrying the down garments, they can be used to warm yourself or others, in case of an emergency. If you don’t carry the proper clothing and gear, you could suffer the consequences. ALWAYS ERROR ON THE SIDE OF SAFETY AND CAUTION. InlandNWRoutes.com Chic Burge David Crafton
0 Comments
From the very beginning, David and I have had a Liability Release Form, but it was hard to find.
David has placed the words….LIABILITY RELEASE at the bottom of each page. We encourage you to click on it, and read it. Only reading it once will suffice. We also use the HONOR SYSTEM in reading and understanding our Liability Release Form. You can also read it by clicking on…….https://www.inlandnwroutes.com/liability-release.html Thank You all very much for reading and using our…… “local human powered website.” InlandNWRoutes.com Chic Burge David Crafton Today, I would like to talk about the 13 ESSENTIALS, and the importance for EVERY outdoor enthusiast to carry their own kit.
There will come a time when you will have to deal with an emergency. You want to be prepared, because the options are not in your favor. THE 13+ ESSENTIALS These item are to be carried by EVERY INDIVIDUAL, whether hiking solo or in a group. Couples are especially encouraged to carry their own 13 essentials, as well as their own food, water, and first aid supplies, just in case one or the other gets separated from their spouse or group. PLEASE, ERROR ON THE SIDE OF CAUTION. NEVER rely on others. And know your equipment inside and out, before venturing into nature. KNOWLEDGE is the most important thing you can take into the mountains. FIRE STARTER. Waterproof matches, lighters, small road flares (for winter conditions). There are commercial pastes, matches, and other types of fire starters on the market. When in nature, you may notice the stringy lichen hanging from tree limbs. Beard lichen is an excellent fire starter, and can be used as a sponge for collecting water. Another use for something we all have around the house is dryer lint. Wrap it in paper like a tube, in a ziplock baggie, or stuff into an extra light container. Keep them in your 13 essentials for emergency use. See “HINTS” RAIN GEAR, UMBRELLA, PONCHO. It is essential that you stay as dry as possible. Rain suits tend to be too hot, while ponchos have more breathing ability. An umbrella is my choice for any hike that may be raining or snowing. Always carry a large lawn bag with many paper towels folded up. The lawn bag can be used as rain gear, and weights very little. MAP & COMPASS...GPS These items are useful tools A GPS IS NOT A REPLACEMENT FOR A MAP & COMPASS, and the knowledge to use them. Batteries die, but maps stay operational. Always have a copy of the National Forest Map, and topo map to the area you are hiking. A National Forest map, and a topo map are important for each member of the outing to have in case of separation or adverse weather conditions. They can be copies in a ziplock bag. If nothing else, PLEASE make a copy of the area you will be visiting, for each hiking partner. You must calibrate your watch that has a compass built into it, as well as your GPS. PAPER CLIP, PIN, NAIL, Another way to tell which way is magnetic north, I learned while watching NCIS. In your 13 ESSENTIAL pack, carry several paper clips. Rub the paper clip against a larger piece of metal to magnetize the smaller piece. When you come across a small pond or stream with still water, place a straightened paper clip on a leaf. Then back away, so nothing on you effects the magnetic field. It may rotate a bit before it settles down. It will show you the south -north line. WATCH You can use your watch, analog or digital. In the case of a digital, you will have to simulate a dial of an analog watch. Point your hour hand at the sun, then observe the 12 o'clock position. Go half way between the two and opposite is north. STICK METHOD In a clearing, pound the stick in the ground, and place a rock at the tip of the shadow. Wait 15 minutes and place a rock at the tip of the shadow. The first rock will be on the west, while the second rock will be east. half way between the two is north. USING THE STARS Thruout life, and observe the stars often for weeks before a hike. By doing this, you will know what constellations are in the south, or the rotation of the Big Dipper in the north. You can also look for the two stars farthest from the handle, of the Big Dipper. Draw a line from the bottom star to the top star, and continue for about 5 times the distance of the two stars. They will be pointing at the North Star, also known as Polaris. EXTRA FOOD. Always carry extra food, maybe in the form of energy bars, but always high in protein. Choose an energy bar that does not require a lot of water to digest. Change out often. A way to tell if your energy/protein bars are a good choice, is to look at the carbohydrates in the bar. Then look at the proteins. The proteins should be higher then the carbs. My choice is a MET RX bar. They are available in the pharmacy at Walmart. They have 32 grams of protein and 18 vitamins and minerals. EXTRA WATER OR WATER PURIFIER Becausevwater is not always available along some trails, carrying enough water is paramount. I often drop water bottles along an out and back route, so I don’t have to carry so much water the full distance. Mark location carefully. See “HINTS” EXTRA CLOTHING Socks come to mind as an important item to have in case your feet get wet. A micro-fiber cloth works well and dries quickly. Other items may include polar fleece jacket and/or pants, spare wool or fleece gloves, stocking caps, and face masks. See “HINTS” In the winter, I carry a Road Flare. They burn at 1500+°, and can start wet wood. PAPER TOWELS & TROWEL I suggest paper towels over toilet paper, because a blow is very messy. The USFS suggests that all human waste be buried at least 6 inches deep, AND AT LEAST 200 FEET FROM ANY WATER SOURCE. THAT INCLUES PEE. I carry several ziplock bags of paper towels in my pack. They are light, and can be of great value, if needed. SHELTER A piece of plastic sheeting and twine will suffice for a shelter if needed. However, a very light bivy tent is a good choice. There are other options to consider. HEADLIGHT & EXTRA BATTERIES I date my batteries when I install them in my headlight. Modern LED/LCD/COB headlights don’t need spare bulbs, so a second headlight is advised. Check the batteries before every trip to make sure you will have light when needed. A COB type of headlight floods the view with way more lumens , hence I've noticed that depth of field and obstacles awareness is improved substantially. See “HINTS” KNIFE I carry several sizes of knives. One for small work like cutting up apples, but a large one if I’m on a potential difficult hike. A large Bowie type knife can be used to make kindling. See “HINTS” FIRST AID KIT You must decide what you take with you. Be extra careful in your selection of proper First Aid supplies. Remember, you are responsible for yourself. Carry what you may need, and add as necessary. Feminine pads are great items to have in your first aid kit. Once on a week long ski trip in Kokanee Glacier National Park, one of the women started her period early. She was two weeks early, so she was in a bad way. We made a game of creating pads from the very sparse inventory of materials. It worked. And think of this...you could be a savior in case of a normal emergency. See “HINTS” SIGNALING DEVISES A whistle, canned air horn, or a mirror work well. SUN TAN LOTION & SUN PROTECTION Make sure your sun tan lotion is always fresh, and close at hand. I prefer a large sun hat like Sunday Afternoon, Solaris, or Sun Blocker. 100% UVA/UVB/IRA sun glasses are wise. If you spend time on snow, side and nose shades on sun glasses will protect your eyes and nose from reflected rays. Snow blindness is a very serious affliction while out. See”HINTS”. The following are other suggested items to take with you. I personally have 84 essentials I take on every trip. I have a check list to assure I’m not forgetting any items. You may have more or less. MEDICAL INFO CARD. (MIC) In our RESOURCE section, scroll down to MEDICAL INFORMATION, and open that file. Here you will find a MEDICAL INFORMATION CARD tab . Click on "Download File" and make a copy. Please fill it out and keep it in the top pocket of your pack. If you are unable to tell the triage nurse your personal information, this card can be of great value. I once made up my list of absolutely needed items. Items I don't want to leave home without. There were 83 items on that list. Now I'm not saying you should carry 83 items, but at least, carry the 13 ESSENTIALS. Below is an important membership I take with me everywhere. This one can save you tens of thousand of dollars. LIFE FLIGHT NETWORK 800.982.9299 LIFEFLIGHT.ORG If you ever need to be transported because of a medical emergency, Life Flight is a small membership fee, to pay for the services they provide. A helicopter transport may cost tens of thousands of dollars. But for 69$, you and all dependents living at your address are covered. This membership does not act as a rescue service, tho. Your transportation is determined by your medical need to be rushed to the nearest hospital. It also covers ground and fixed wing medical transportation. Call 800.982.9299, or log onto lifeflight.org. DO NOT PASS UP THIS OPPORTUNITY. CALL AND BECOME A MEMBER NOW. As you walk into an area, lake or onto a ridge top, notice the terrain you are waking in, along the way. As well as mid and far off terrain features., like mountains, mesas, power lines, etc.
These observations can help you if you get misplaced. And if you get to a summit, you can ask your hiking partners if they see any features they pointed out on the hike in. I always have fun identifying far off peaks. Once on a summit I pointed out all the peaks I’d been on in the past. One of the hikers pulled out her phone and brought up “Peak Finder” the app. Peak Finder is a free or very inexpensive app. She was amazed that I knew and had been on so many of the peaks. By doing this with your partner, you both can see “the lay of the land.” It’s a real important thing to know. The next time you are on one of those far off peaks, you can get a greater perspective of the vast land before you. And ID the mountains you have been on. A few of the things you want to be able to identify are…. Notice the direction you are walking in or walking away from. Ask your hiking partners if they can quickly tell you what direction they are headed. Occasionally ask your fellow hikers, which way is north. Even do this exercise at night. Using the stars to navigate is an important skill to learn. Years ago we used to stash our avalanche transceivers around our property. One of us would, out of the blue, hand the other a transceiver, and say….an avalanche has occurred. You have three minutes to find the transceiver. Don’t do this when she’s in the shower, tho. But think past transceivers, and on your next hike, play a game with your hiking partners. Dream up different scenarios to practice with your hiking partners. By making it a game, you can play and learn important skills we all need to be able to do. Knowledge and skills are your MOST IMPORTANT things you can take into the mountains. Like muscles, if you don’t use them, when you need them, you may not be able to save yourself. This idea goes way beyond just identifying directions. Ask your hiking partner….. How do I stop bleeding? How do I treat a sprained ankle? How do I use a compass and a map? How fast is the wind blowing? And from what direction is it coming from. (All weather reports only show from which directions the winds blows from. That because we know where it came from, but we can not be sure of which direction the wind will blow.) If you know your hiking partner is weak in an area, create a way to teach them what they need to know. It’s not hard, and can save a life. In mountaineering, we are taught from the first day….YOU are responsible for YOURSELF. Of course, you should always look out for your partners, because stuff happens in the mountains. The more you know, the safer you will be. Ps…..I’ve hiked and skied with a friend for well over 40 years. We are constantly asking each other off the wall questions. One is to see if the other is coherent. And the other is to sharpen both our skills. c. InlandNWRoutes.com Chic Burge David Crafton  This photo is from the Mirror Pond Viewpoint on the Bull River Road, Hwy 54, with Ibex and Snowshoe peaks in the background only 2 hours and 15 minutes of easy highway driving from my house in the East Spokane Valley. I love this place. It is a mini Glacier National Park with out all the people. On the other side of the ridge is Granite Lake with a 4,000 foot head wall up to A Peak with several water falls coming off of it which are most spectacular in the spring.
From the title of this BLOG, you may assume that cotton clothing is a hazard in the mountains.
In our lives in the cities and towns, cotton t-shirts and other cotton clothing are very comfortable and work well to keep us warm and stylish. However, in the mountains, any cotton clothing can and has caused people to die. Cotton absorbs sweat and other moisture it come in contact with it. Cotton does not dry quickly, or wick moisture away from our bodies. Hence, the moisture builds up and causes all your other clothing to become saturated. When this happens, our clothing becomes cold, and cold wet clothing does not hold heat in our bodies. In fact, wet clothing, zaps our bodies heat, and if not dealt with immediately, can cause hypothermia and/or other cold related conditions. These conditions can cause our body and brains not to even realize we are getting cold. I led a backcountry ski trip to Stevens Peak, in January years ago, in which a ski buddy stared unzipping his jacket, dropped his gloves in the snow, took off his beanie, and could not answer simple questions. It took all six of us over an hour to warm our ski buddy enough to convince him that we all needed to get out of the mountains and seek medical help. But it isn’t just cold weather that can affect you. On another hiking trip to the Twins of The American Selkirks, we started the hike in 75° temps. Up near the Twins we found a place out of the sun to have lunch with a view. My thermometer read 92°. About half way thru lunch, a sudden storm rolled in from the west, that we didn’t see coming because of our hide out from the sun. It rained heavy, and it adversely effected one of us on the hike. When the thunder started about half way down the trail, she frantically insisted that the people in Bonners Ferry were shooting mortars at us. The thunder echoing in the canyons, didn’t help. The other girl on the trip was a friends, friend from Japan, and spoke little or no English. I used hand gestures to let her know what we needed to do, fast. The Japanese girl was also getting cold, so I put one on each side and grabbed their arms over my shoulder. It took hours to get them down to the car. Because of the effort the Japanese girl exerted, she warmed up enough to help get the other girl safely to the car. But she was not out of the woods yet, I put them in the back seat under a blanket to transfer body heat. I also placed our water bottles up by the defrosters to warm them. If the girl that owned the car found out the speeds I was driving down the Pack River Road, to get her to the hospital, I’d be in big trouble. By the time we got to the hospital, the staff assured me she was out of danger. Later I found out her polypro was in the laundry bin waiting to be washed. She had on a long sleeve cotton t-shirt. COTTON KILLS Those are the words I used in my lecture at NIC, during all my Backcountry Safety classes. I want to emphasize that what you wear, is an important as what you know and what you do in the mountains. Base Layers should only be polypropylene of equivalent. Warmth Layers should only be polar fleece or equivalent. Both of which wick moisture away from your body. Outer Layer should be waterproof, breathable, and should be treated every year to insure its water repelling capabilities are working. This suggestion should also cover every piece of clothing or accessories you take into the mountains. Just remember…COTTON KILLS In our RESOURCES section, David and I have listed the equipment we take into the mountains. Below are links to each section, you should read and adhere to, to be smart safe in the mountains. Of course, there’s a whole lot more you need to know, above this BLOG POST, so I encourage you to read all of our RESOURCE section. https://www.inlandnwroutes.com/medical-information.html https://www.inlandnwroutes.com/gear.html https://www.inlandnwroutes.com/hints.html With cold weather only a month or two away, NOW is the time to look at your gear, and bring it up to safety standards. If all of this seems like a lot to deal with, try dealing with being hospitalized for hypothermia or worse. Our sole wish, is to provide the information you need to know, so you can be safe in the mountains, and return to your loved ones. If you have other suggestions, please send your comments to Chic at chicski@icloud.com. InlandNWRoutes.com Chic Burge Davis Crafton Below is the latest information on bears and how to handle an encounter, from the Montana Fish, Wildlife & Parks (MFWP) PLEASE LOG ONTO THE FOLLOWING URL'S AND LEARN WHAT YOU NEED TO KNOW. https://fwp.mt.gov/conservation/wildlife-management/bear/be-bear-aware/bear-encounters?emci=0a07ed16-e54c-ee11-a3f1-00224832eb73&emdi=d4ffadba-004d-ee11-a3f1-00224832eb73&ceid=1038022 https://www.youtube.com/watch?time_continue=25&v=s-zkGuh42l4&embeds_referring_euri=https%3A%2F%2Ffwp.mt.gov%2F&source_ve_path=MTM5MTE3LDIzODUx&feature=emb_title Then go to our RESOURCE section and read a similar article from Canada. THE MORE YOU KNOW, THE SAFER YOU CAN BE https://www.inlandnwroutes.com/wildlife1.html InlandNWRoutes.com Chic Burge David Crafton 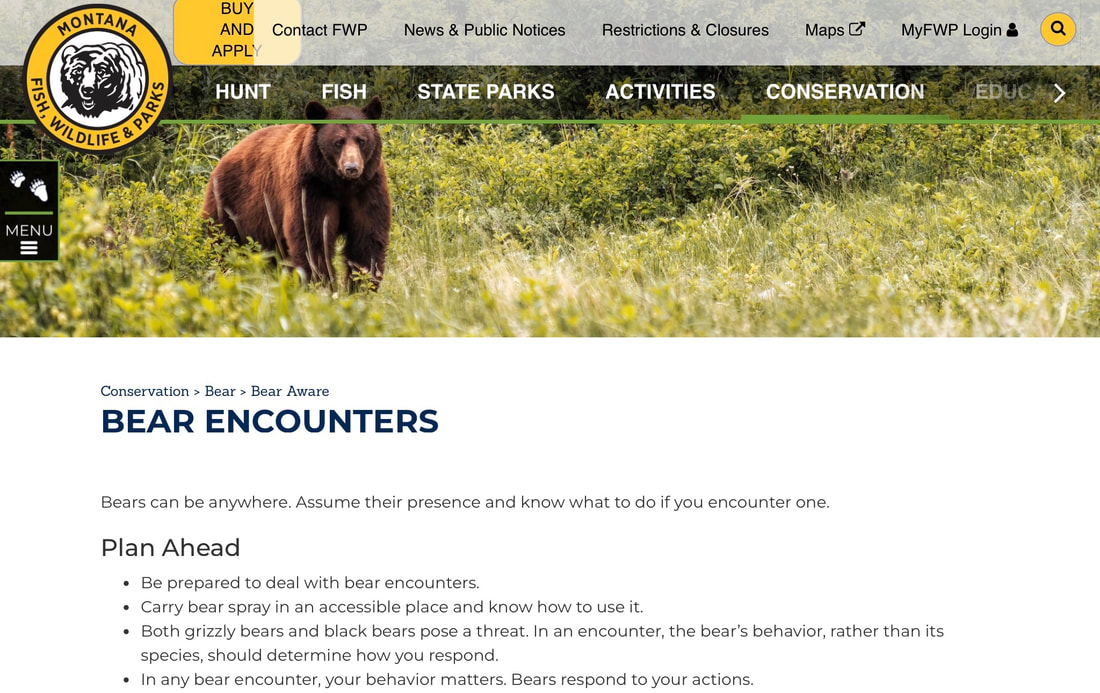 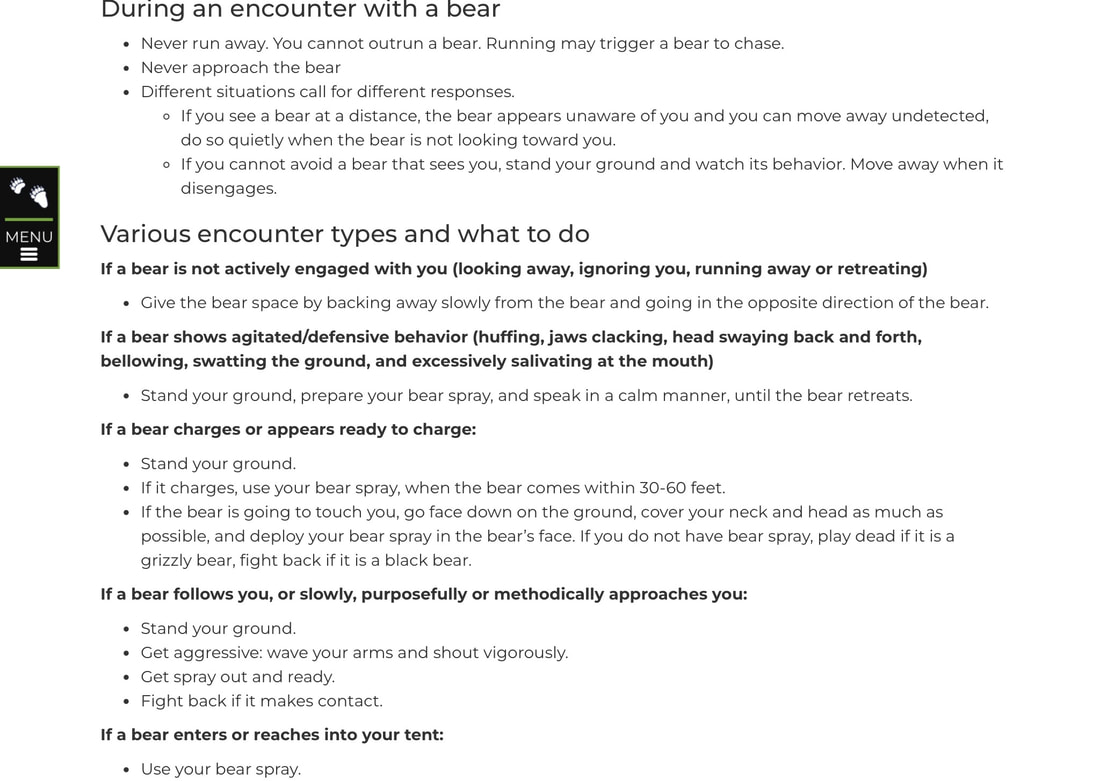 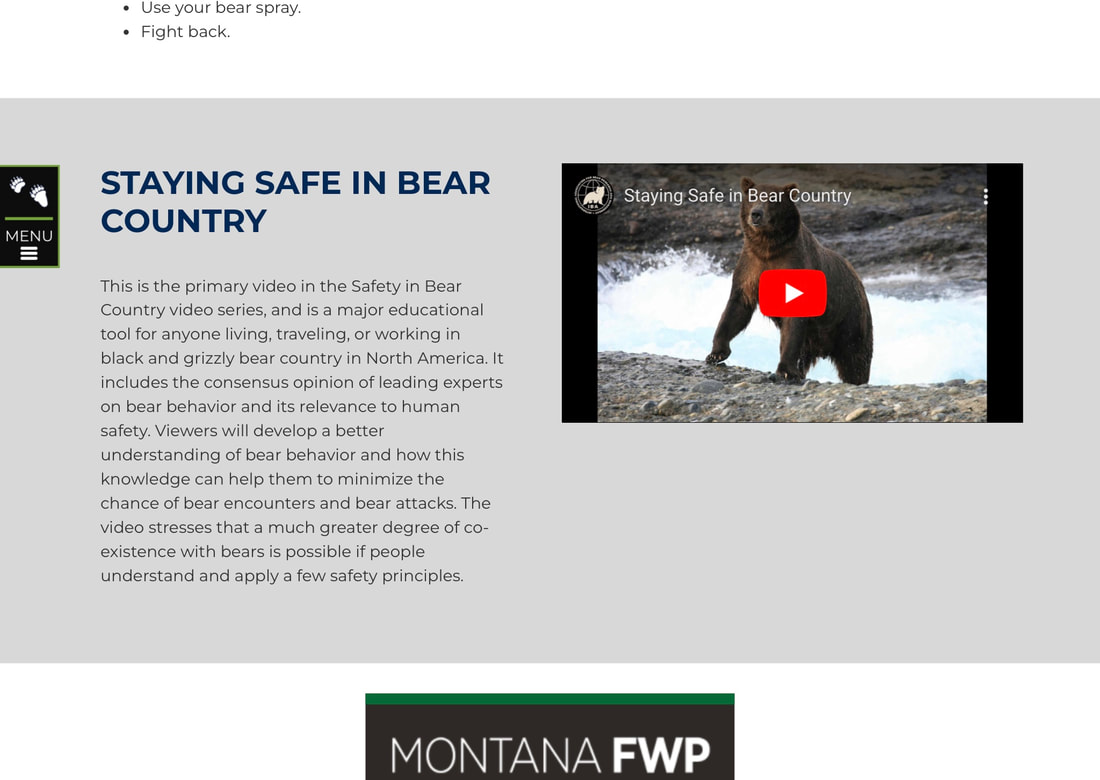 FALL COLORS HIKES
As summer is coming to an end, spring is turning the mountains into a beautiful color wheel. During the last two weeks of September, and the first two weeks of Roctober, we can enjoy incredible fall colors all around our region. Below are a few of the best. Lower & Upper Stevens Lakes & Peak 6838’ https://www.inlandnwroutes.com/upper-and-lower-stevens-lake.html Undoubtedly the best in our region. Be sure to go to the Upper Lake. https://www.inlandnwroutes.com/stevens-peak-via-west-willow-ridge-6838.html. NOT FOR BEGINNERS And do this hike/scramble clockwise. Counter Clockwise is too dangerous on the descent. Leigh Lake, CMW, MT. https://www.inlandnwroutes.com/leigh-lake.html Once at the lake, there is a trail along the right (N) shore line. Across the Leigh Lakes outlet creek is a campsite with different views. Be careful crossing on the logs. Roman Nose Lakes & Peak https://www.inlandnwroutes.com/roman-nose-lakes--peak-idaho.html Great hike for the kids. Three lakes and an easy very scenic trail. If you have relatives that are disabled, there’s a board walk around the south shore line. They can fish, with an Idaho Fishing License. There is a Nature Trail above the first lake. If you are adventurous, go for Roman Nose Peak. The views of the Seven Sisters across the Pack River are well worth the effort. Gypsy Peak https://www.inlandnwroutes.com/gypsy-peak.html This is a beautiful ridge line hike in the Salmo-Priest Wilderness. There is no water source along this trail. Be prepared. Stash a few water bottles along the upper trail, for the walk out. BE SURE TO MARK WHERE YOUR STASH IS. John A. Finch Arboretum https://www.inlandnwroutes.com/finch-arboretum.html The Finch Arboretum is a great place to go year round. But in Roctober, there can be 6-8” of fallen leaves on the ground, with Garden Springs Creek running thru it. Some areas are ankle deep in yellow leave. Boundary Dam, Pewee Falls, Crawford State Park- Gardner Cave, and Hwy 31. https://www.inlandnwroutes.com/pewee-falls-pend-orielle-river.html https://www.parks.wa.gov/492/Crawford https://www.inlandnwroutes.com/sweet-creek-falls.html First, the drive up to Boundary Dam is exceptional. Hwy 31 is loaded with fall colors. Don’t miss the Sweet Water Rest Area and its waterfalls. Boundary Dam offers tours. Paddling the Pend Orielle River to Ratt Island and Pewee Falls is a must do. But do not miss the Gardner Cave. It is only open 5.15 to 9.15 InlandNWRoutes.com Chic Burge David Crawford In July 2023, I realized that I needed ankle surgery. I went to a sports medicine business in CDA, and was not please. So I made an appointment with CDA Foot & Ankle Clinic. I had been there decades ago for orthotics, so I thought I’d try them again. What I noticed first, was the incredible staff. They all were extremely knowledgeable and kind in the treatment of their patients. Then it came to surgery day. I was a tad bit nervous, but my anxieties were brought under control. The attending nurse was very efficient and calmed me down. Then Doctor Orlando Nunez came in ready to start the procedure. Dr. Nunez was calm, and explained what was about to happen. Unlike any other doctors office I’ve ever visited, Dr. Nunez utilizes a GE OEC ELITE MINIVIEW X-RAY machine to see what he needs to know about the area being worked on. 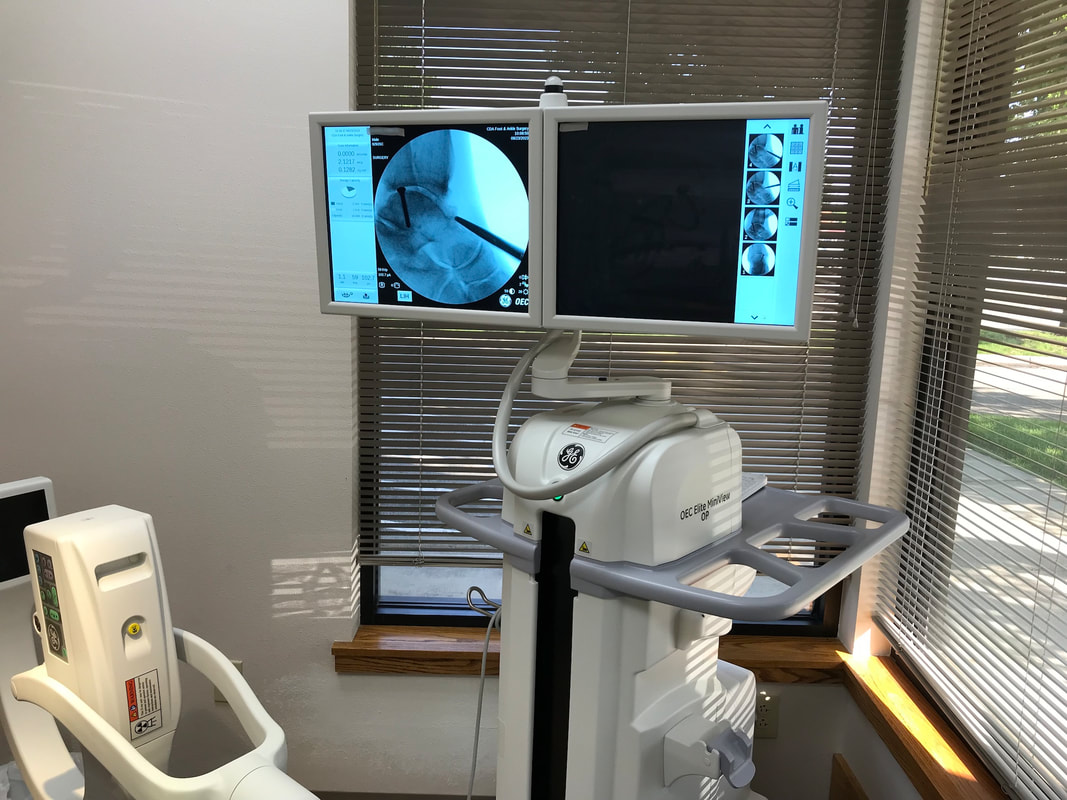 This x-ray machine has an articulated arm (L) that my foot was in.
What’s so cool about this x-ray machine, was it was a live feed. As he moved my foot around to examine my Talus, I got to watch the the screen and see what he was seeing, live. Otherwise, it isn’t just a normal x-ray picture. It was a moving x-ray. He captured stills to be able refer to as he worked on my foot. The previous doctor said my surgery could take weeks before I could touch my foot to the ground, and months to fully recover. As my surgery wrapped up, I ask for my crutches. Dr. Nunez stopped me and said with the new stabilizing boot, I could walk out of the office without the need for crutches. I was amazed. So the take away here is simple. If you need any kind of foot or ankle work done, make an appointment with the CDA Foot & Ankle Clinic. You won’t be disappointed. https://www.cdafootankle.com/home/. 208.666.0605 InlandNWRoutes.com Chic Burge David Crafton DETERMINING AREAS ON FIRE AND SMOKE PLUME DIRECTION
We have decided to clean up our home page. There is just too much information, which made it harder to navigate thru. So, I have moved the section “DETERMINING AREAS ONFIRE, SMOKE PLUME DIRECTION, to RESOURCES……under WEATHER, THUNDERSTORMS, LIGHTNING & MORE. As you are planning your next outing, please refer to the above sections to get a better idea of what the weather and fire conditions are in the area you are planning to go to. But most of all….PLEASE CALL THE RANGER DISTRICT of the area you are planning on visiting, at least 3 days before. Their phone numbers are listed on each trip write up, and under MANAGING AGENCIES in RESOURCES. Things change and happen without our knowledge. Hence, we offer ways to determine fires, smoke plumes, and closures of all kinds. Soon, we will have only the Ranger Districts URL’s on our HOME PAGE. But if an area is closed for whatever reason, we will list them on their respective trip write ups. That way, you all will see the USFS Closure order. You will be able click on the USFS Order, to read it for yourself. THANK YOU ALL FOR BEING OUR READERS InlandNWRoutes.com, Chic Burge David Crafton |
AuthorWe would like to engage our users so we have started this blog so that we can interact with you. Please do not hesitate to comment on our posts if you have questions or things to add. BLOG ENTRY INDEX
Archives
April 2024
Categories |
 RSS Feed